Saturday, February 5, 2011

Snow Two Years in a Row

Snow is not a common occurrence in central Texas.  To have a measurable snowfall two years in a row is really something.  Moisture in any form is always welcome in a rural agricultural community.  The sight of a thin blanket of snow over land that's been plagued with drought for several years running is beautiful.  So as soon as Yeoldfurt had the water flowing again at the house, I took the camera and the dog and headed for the big pasture.   

My excuse was to check fence which is always a good practice after any windy weather.  But the truth is, I just wanted to forget the troubles of the last few days and enjoy the scenery.  Since snow is so rare in these parts, winter here is usually dull and barren. Just dormant vegetation in multiple shades of brown against the variegated gray of winter skies.  To see all that dullness dressed up in white from fresh fallen snow is just breathtaking while it lasts.

The catch pond had been completely dry most of the summer because of the drought.  A week of heavy rain in November brought the water level about halfway back to normal again.  Hopefully, we'll have better rainfall this spring and summer.  

Looking back toward the house and barns, the snow was already starting to melt as the temperatures were finally above freezing.  The afternoon forecast called for sunny skies and temperatures in the low forties.
 

The thing about walking dogs in the country is that they get to lead the way.  We take our dog with us whenever we walk the property or even if we just walk up to the road to get the mail.  She never takes off and one word from either of us stops her in her tracks or brings her to our side.  She's revels in the freedom of no leash and I smile at the freedom of having absolute control with no leash. 

The purpose of the venture was to observe the winter landscape but it wasn't long before we were being observed by the horses. 

Being herd animals, when one horse is interested enough to stop eating, instincts take over in the herd and it isn't long before the others are checking you out too.  

If they all stop eating long enough to snort and stare, it won't be long until someone is elected to come check you out.  Dancer being the low mare on the totem pole almost always draws the short straw.  She circles off to my left, probably intended as a diversion.

Then the others move in from the opposite side. You remember these two from Devious Deeds, I'm sure!  When things are boring, they pester one another so much you'd think they couldn't stand each other.  But when an adventure is afoot, they are always together and always right in the middle of it.  They move in to my right in an obvious attempt to flank me.
 
I was never a threat to them and they were never a real threat to me or the dog.  It was just a silly game of sneak attack, invented as a way to warm up on a cold winter day.  Either they got bored because I wasn't playing 'scared' for them or they worked up an appetite from their little game because they were back to foraging in a matter of minutes and the dog and I continued our walk down the back fence line.
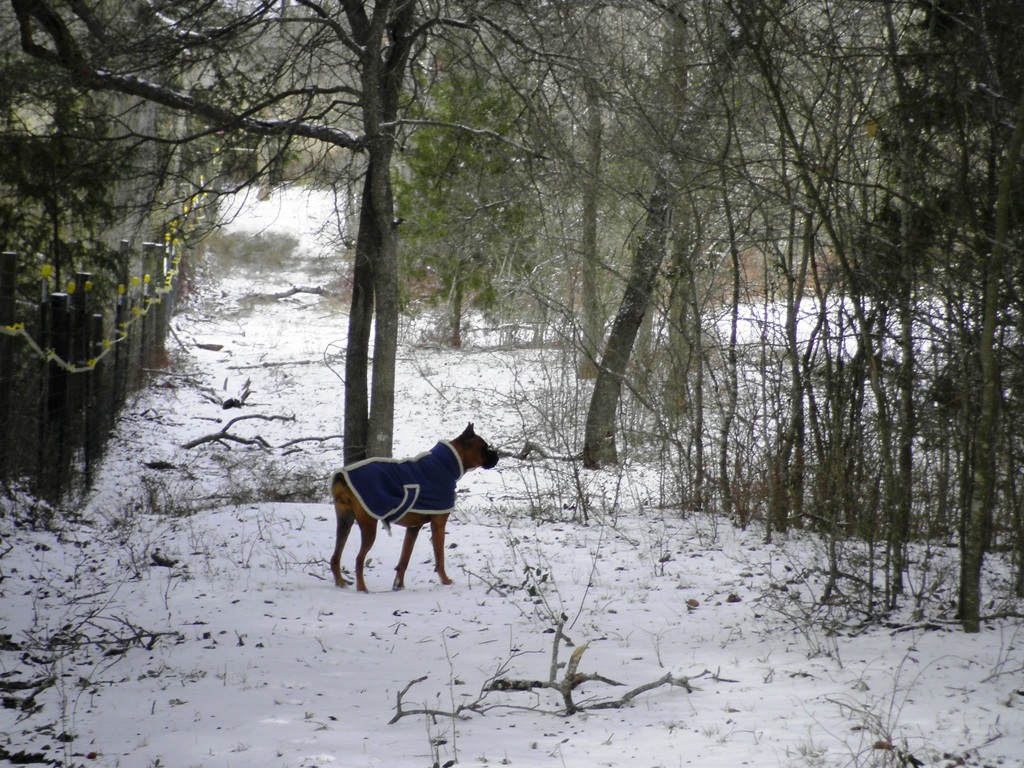
There were plenty of downed limbs on our property and the neighbors, but none that damaged the fenceline so it was just a nice walk in the woods.  But after about 20 minutes, my face felt stiff from the cold so we headed back.  I was cold and I could no longer feel my toes.  But I was smiling because I knew I was going to be able to enjoy a long hot shower that evening ...all thanks to Yeoldfurt, my very own Dragon Slayer!

Friday, February 4, 2011

How It Really Was

Last night when Yeoldfurt came home from work, he was met at the door by a very bedraggled unhappy wife.  We had been three full days without 'indoor plumbing.'  I have been known to primitive camp for a long weekend from time to time and I have roughed it out of circumstance and necessity in a house with no lights or electricity for as much as a week a few times.  But when I was camping and roughing it, I wasn't also trying to pull off a 'professional' appearance at an office job every day.  This past week was tough.  I am no barbie doll that has to have all the frills and froo-froo every day ...but that doesn't mean I have no standards for cleanliness.  By the time Yeoldfurt got home from work last night, I was not clean, my floors were not clean, my counters were not clean, the laundry was piling up and I just had a melt down.

Yeoldfurt, being the gentlemanly knight that he is, let me blow off my steam and 'wring out my rag' as my sister calls it and then promised me it would get better.  Today, he made good on that promise.  It was still bitter cold but he was outside with my hair dryer first thing this morning, trying to thaw out the water line feeding the house.  

It took quite a while but he finally got a drip going.  It was slow at first, intermittent at times, but it was progress and I was happy.  We left the spigot open and went in the house to warm up. 

We opened the taps in the house too so air could work its way out of the lines.  Thirty minutes later, we had water.  It was wonderful! 

When Yeoldfurt mentioned in his first post this morning about HB not being happy ...he was understating the facts out of kindness to me.  When he made light of his day's accomplishments in his last post this evening ('another dragon bites the dust'), he was just being humble.  Ain't he sweet? 

Thursday, February 3, 2011

Still No Water

Yeoldfurt posted Wednesday morning about us waking up to no water in the house. He emailed me at work mid-morning to say the rural company that supplies our water had an issue overnight that they expected to have resolved by noon. We were both hoping our lack of water was due to the water company's issue. But when I got home mid-afternoon, there was still no water. It was too late to call the water company for an update. But my best guess is they fixed their problem and we could now assume our lack of water was our problem. Guess we won't know until at least Saturday since the daytime and nighttime temperatures will remain at or below freezing until then. The prediction right now is mid-50's for Saturday. By the time we hit 40 degrees, it will be pretty obvious if we have a busted pipe. We're still hoping for the best though.

The day before yesterday, we were rudely awakened fifteen minutes before the alarm went off to a big crash outside. The wind was howling when we went to bed the night before and I knew right away what had happened.

Do you remember this tree? 


It was dead as a doornail after last year's drought and had been slowly shedding it's bark and smaller limbs.  You can see how close it is to the chain link fence and stalls on the right.  What you can't see in this pictures is our house about twelve feet to the left of the tree.  Every time I walked by it, I would try to knock a few more limbs off and offer a little prayer that it would miss the house and the fence when it finally came down.  That was the sound that awakened us fifteen minutes before the alarm on Tuesday ...the sound of an answered prayer.

This is what the tree looks like now.  
It missed the house AND the chain link fence.  If we had cut it down ourselves, we could not have laid it so perfectly in that narrow space.  It will be a lot of work to get it all cleaned up, but at least it's down and no longer a threat to the other structures.  

We lost several trees in last year's drought, included these tall pines along the driveway. 


That picture was taken at the end of last summer.  They look like dead soldiers, all lined up along the driveway.  A few months later, we paid a contractor to take the tops off to make them more manageable.  They were all sixty to seventy feet tall and would have either blocked the driveway or taken down the power line on the opposite of the driveway if we tried to fell them without topping them first.

This is what they look like now, decapitated sentries. 


This picture doesn't show you the seemingly endless piles of brush created by the decapitating.  We're still working on cleaning those up and then we'll cut what's left of the trees down to the ground.  They were pretty when they were alive and healthy.  But I would rather have them gone entirely than still standing in their present state.

Such is the country life.  There are always going to be fences to be built or repaired, animals that need feeding or doctoring, gardens that need to be planted or harvested.  Rain or shine, there are always chores to be done.  It's a labor-intensive life and it's not for everyone.  Sometimes my city-dwelling co-workers see pictures or hear me talk about things we're doing out here.  Then they tell me how much they wish they could live out in the country, have horses, raise a garden, enjoy a simpler life.  They might even really believe it when they say it.  But I just smile because I know better.  They would enjoy it like they would enjoy a vacation.  They'd have fun for a while and then be ready to go back to the city.  They would be missing their Starbuck's and their movie theaters.  

Wednesday, February 2, 2011

Monkey Bread and Cinnamon Rolls

I discovered Monkey Bread when I was in my early twenties.  Someone brought some to an office Christmas Party, I got the recipe and it has been a holiday tradition in our home ever since.  Over the years, I've found the same recipe by different names ...Cinnamon Bubble Ring, Cobblestone Cake.  It's all Monkey Bread with a fancier name.  I like to bake it in a fluted bundt pan because I think it's prettier but you can use a 9x13 rectangular pan or two 8-inch round or square pans.  I've even seen it baked in a 2-pound coffee can.  Just spray whatever pan you will use with Pam (or similar) nonstick cooking spray before you add the dough.
The recipe is very simple.  You need:

4 cans refrigerator biscuits
(Pillsbury or store-brand, doesn't matter)
1 cup sugar plus 2 Tbsps cinnamon
1 cup brown sugar
1 cube butter, melted (not margarine or butter substitute)
 
Put the sugar & cinnamon in a large ziplock bag
Open the canned biscuits, cut into fourths
Drop the dough pieces a few at a time in the ziplock bag
Shake to coat, then put them in pre-sprayed baking pan
When all the dough pieces are in the pan,
Combine the brown sugar & melted butter
Pour evenly over the top of the dough

Bake at 350 degrees for 30 minutes, then cover top with foil and back an additional 10-15 minutes

To serve, place an appropriate sized/shaped platter over the baking pan and invert.  Can be served warm or cold and makes a good breakfast bread.  

I have been making cinnamon rolls for several family members and friends at Christmas for almost 20 years.  I usually half the dough and make two 8-inch pans (approximately 12 rolls in each pan) from one recipe of dough.  I also make a Monkey Bread or two, usually at my daughter's request and usually using my fluted bundt pan for the Monkey Bread.  While I was thinking about Monkey Bread the other day, it occurred to me that I could stack the rolls on their sides in a bundt pan and I would have pull apart cinnamon rolls!   A cinnamon roll ring!  When it was done baking, it would fit on a normal 8-inch dinner plate or round serving platter and it would be easy to use a fork to pull one (or two) rolls off at a time. Ahh, decadence and convenience all in one pan!
I was had a day off a few weeks ago and Yeoldfurt was at work, so I decided to give it a try.  My fluted bundt pan that I use to make Monkey Bread held all but five of the rolls.  So I used a small rectangular Pyrex dish to stack the remaining rolls. The result, I hoped, would be a pretty and easy to serve Cinnamon Roll Ring and (mini) Cinnamon Roll Log. 

This is what the rolls looked like after 45 minutes raising time in my Excalibur dehydrator...

As you can see, there was not much 'head space' remaining for the rolls in the pyrex dish.  These rolls always rise a bit more during baking so next time, I will use one of my 1-pound loaf pans instead to give them a little more room. 
 
After they're raised, I always sprinkle the tops of the rolls with cinnamon and sugar, then cover with a generous layer of brown sugar.  The last step before baking is to melt a cube of butter (not margarine or spread) and pour over the top of the rolls.  When I was making the recipe in two 8-inch square pans, I would use 1/2 cup melted butter on each.  Since the bundt pan held considerably more rolls than the pyrex, I poured approximately 3/4 cup butter over the bundt pan and the remaining 1/4 cup over the pyrex. 


I was able to bake them together in the same oven, but since the rolls in the pyrex were already so close to the top of the dish, I had a lot of bubble-over during the baking process.  A waste of buttery goodness and a mess in the oven!  Using the 1-pound loaf pan next time should eliminate that problem.   This is what they looked like after baking.  We haven't sampled them yet, but I've been making these rolls for so many years, I can tell by looking if a batch came out good.  These will be good!  


Using the bundt pan and 1-pound loaf pan will streamline my holiday baking from now and I think it makes a prettier end product as well.  

This batch went to my office with me the following week and when the email came around two weeks after that announcing an upcoming Breakfast Staff Meeting I was asked by several co-workers if I was planning to bring another batch to the meeting.  I guess they were a hit!  I'm happy because it's so much faster and easier to bake them this way and I think the end product is pretty.

Yes, pretty matters at least to me  ...if I can't make it pretty, I won't want to make it.  If I don't make it, nobody gets to eat it.  So pretty matters.  Yeoldfurt was a quick study on that one.  Ha! 

Sunday, January 23, 2011

Comfort Foods

Most of us have memories centered around a special dish or food that we enjoyed when we were growing up. A special dessert your grandmother used to make, a supper dish that was a family favorite, even something special your mom used to make for you when you'd been under the weather. Comfort foods. As good for the soul as they are for the tummy! Baked Macaroni and Cheese is one of those dishes for me. I worked full time the whole time my kids were growing up and I am ashamed to admit when I served them Macaroni and Cheese, it almost always came from a box. They loved it, but they didn't know any different. If I had started them out on Macaroni and Cheese the way my mom made it and then introduced them to Kraft Shells N Cheese in a box, they would have thought I have complained loudly. There is just no comparison.

Since both CHEESE and PASTA (any shape will do) are pretty high on Yeoldfurt's list of favorite foods, this dish is one of his favorites. When my mother made this, she didn't put meat in it because she generally served it as a side dish to meat, and she started with a thick White Sauce made from scratch, then melted cubes of cheddar cheese into it. I've added meat to it as a matter of convenience (one dish meals mean less work and less clean up!) and I usually melt some of the spicy Mexican Cheese version of Velveeta for the sauce ...also as a matter of convenience. If I didn't have a full time job that kept me away from home 10 hours of the day, I would make my cheese sauce from scratch too, but even with Velveeta, it's still really good.

There was one thing my mom did as a garnish that I have never done for Yeoldfurt. She would beat an egg with about two tablespoons of water and a little salt & pepper to make an egg wash. She would set that aside in a pie plate. Then she would put about a cup of crushed saltine crackers as a coating in a separate pie plate. In the meantime, she was melting a cube of butter in a small skillet. She would slice one good sized tomato in five slices (there were five of us), dip the slices in the egg wash, dredge them in the crackers and then fry them in the melted butter until they were golden brown on both sides. Just before she put her macaroni and cheese in the oven to bake, she would put these fried tomatoes on top as a garnish. It was a pretty garnish and oh so good!

When Yeoldfurt was leaving for work today, he mentioned that he'd like some Macaroni and Cheese for tomorrow's supper and I told him about the fried tomato garnish my mom used to do. His eyes lit up so we'll find out tomorrow night if he likes it as much as he thinks he will.

As I said, my Macaroni and Cheese is based on the way my mom made it, but tweaked to accommodate our busier lifestyle and Yeoldfurt's penchant for spicy. Yeoldfurt asked me to share the recipe, so here you go:

Meaty Macaroni & Cheese
2 cups uncooked elbow macaroni
4 slices bacon, cooked crisp and crumbled
(save the drippings!)
1/2 cup diced fresh onion
2 cups sausage links, cut into 1/2 inch pieces
1 lb Mexican Velveeta, cubed and melted
1 cup milk (add 1/4 cup at a time, mix well after each addition)
4 Tbsps butter

Fried Tomato Garnish (optional)
1 large firm tomato, evenly sliced
1 egg plus two tablespoons water, well beaten
1 cup Saltine cracker crumbs
Salt/Pepper to taste
1 cube butter, melted

This is what it will look like assembled & ready to bake:
Spray sides and bottom of a 9x13 deep baking dish with nonstick cooking spray, set aside. Cook pasta, drain and set aside. Cook bacon slices in oven at 375 degrees until crisp, approximately 20 minutes. Set bacon on paper towel to drain and pour drippings into a medium sized skillet. Add sausage and diced onion in skillet over medium heat until sausage is slightly seared and onions are translucent. Melt cheese cubes and 4 tablespoons of butter in the microwave, add 1/2 cup milk and blend well. Put cooled pasta in the 9x13 baking dish. Add sausage and onions and mix well. Pour melted cheese over top and stir to coat all of the pasta. Set aside while you make the fried tomatoes.

When you start frying the tomatoes, you want to set up an assembly line because they will cook very quickly. Melt the butter in the same skillet you used when you cooked the sausage and diced onion. Crack a raw egg into a shallow dish, add two tablespoons of cold water, and beat well. Add salt & pepper to taste. Crush the saltines and put them in shallow dish ...a pie plate works well. You need to have a couple of layers of paper towel on a plate next to the skillet to drain the fried tomatoes when they're done. Once everything is ready, set up your assembly line ...tomato slices, the egg wash, the pie plate of saltine crumbs, the melted butter in the skillet and the paper towel to drain ...in that order. The tomatoes will only take a few minutes to cook once you get started, so now would be a good time to preheat the oven to 350 degrees. After all the tomatoes are fried and drained, arrange them on top of the macaroni and cheese.  What the heck, if you're feeling decadent, pour the melted butter from the fried tomatoes over the top too.  Everything is better with butter, right?  If that feels a little too decadent, you're just kidding yourself ...it's not like this recipe would ever make it into the Heart Healthy magazines!  Now sprinkle the crumbled bacon evenly over the top and bake at 350 degrees for 20 minutes. Cool for 5 minutes before serving. A nice tossed salad and some fresh or canned fruit for dessert and you have a complete, well-balanced meal.

If you want to make this ahead, you can cover it with plastic wrap and it will keep for several days in the refrigerator, or can be frozen for several months. If you plan to freeze it but want to use the fried tomato garnish, I would freeze it without the fried tomatoes and make them fresh before you bake it.

Thursday, January 20, 2011

Where to Begin

I don't think that either Yeoldfurt or I consider ourselves experts necessarily on prepping or long-term food storage. But since we started down this path a couple of years ago, we've learned a thing or two ...most of it the hard way. We've also accomplished a thing or two during that time. So since the real purpose of this blog is to share information, I'm going to try to share what we've learned. This post is my first installment on that effort.

Food and water are the most basic of necessities. Stockpiling these necessities is not a new concept but, in light of our floundering economy and rising costs, it is fast becoming a very popular one. There is so much to take into consideration when you decide to embrace this lifestyle. How many people are you planning to take care of ...for how long in a worst case scenario? Are you preparing for temporary hard times, or a full blown collapse of this economy? No one has a crystal ball and no can really prepare for every single contingency. You just have to take an objective look at your own situation, your own needs, and your own limitations and then do the best you can.

You will need space for your long-term storage. How many people you intend to take care of and for how long will determine how much space you need. Underestimating the space can be a serious pitfall. So calculate carefully and then round up on your estimations. I had a boss once that used to say, 'It always takes a third longer than you expect.' He was talking about estimating labor costs when bidding a contract, but I've found that 'a third longer' is a pretty good rule of thumb. So when you round up, round up by a third. It's much easier to find out you didn't need quite as much of a particular prep item, or didn't need quite as much storage space overall than it is to find out you needed much more.

There are two basic things you need to know before you can determine how much you need in terms of preps or storage space. You need to know how many people you are planning to support and for how long. Obviously you know how many people live in your household, but do you have extended family that you will accommodate if they show up on your doorstep? If so, it's much better to plan for them and have them not show up than to not plan for them and run short in a crisis. So decide how many people you want to accommodate in a worst case scenario. Next decide how many months worth you want to store. We decided on 12 months. The LDS church has always advocated a 12 month supply. It's long-term enough for you to get through most temporary personal crises and short-term enough to be manageable in terms of rotation. But I have known families who just keep a month or two ahead and other families that have literally years worth of staples. Decide what YOU are preparing for and plan accordingly.

Now that you know how many people you expect to accommodate and how long you expect to accommodate them in a worst case scenario, you can start your itemized list of what you will be storing. It can be mind-boggling at first. Somehow the hardest things to estimate for 12 month supply are the very things that are the most fundamentally essential to our daily life. Toilet paper is a good example. It's something we ALL use daily and would all miss dearly if it wasn't there. Yeoldfurt and I jokingly refer to it as 'rolled gold.' I say jokingly, but we take it very seriously. Off the top of your head, if you were new to prepping, would you KNOW how much toilet paper you would need per person for a 12 month supply? Before last year, I wouldn't have. For most people, their initial estimate would tend to be high because their estimate would be influenced by their keen desire not to be caught short. But investing more than you need of one item at some point robs you of the ability to invest enough in some other need. So it's important to be as realistic as possible in your estimation of quantities for all things. Breaking everything down into a one week or even a one day supply will simplify the task.

When we were just starting out, Yeoldfurt found a list online somewhere and built our list from that using Excel spreadsheet software. If you're building the list on the computer, any software will do ...but I highly recommend using a spreadsheet so you can easily sort. Most wordprocessing softwares will sort also if you set them up correctly, but it's not as user friendly. If you have spreadsheet software, that's definitely the best way to go.

Every item on Yeoldfurt's initial list was in alphabetical order. I decided early on that I needed to reorganize it into categories if I was going to be able to use it week to week. I also found that it included a lot of things that we didn't really use. Every family is different and has different needs. I'm the shopper and the cook in our household, so the list had to make sense to ME if I was going to be able to use it efficiently. Every person is different. Every family is different. You have to make sure the list fits your situation.

These are the eight categories that I used to organize our list:

Beverages & Related Condiments
Canned/Dried Goods
Cereals/Grains/Pastas/Stuffing
Cleaning Products/Chemicals
Condiments/Sauces/Salad Dressings
Cooking/Staples & Mixes
Personal Hygiene
Paper/Plastics/Foil

An inventory list is only useful if it's kept current. When I pull something out of storage, I write it down on my grocery list for the following week. Then a day or two before I plan to shop, I add any items from the inventory list that we're short of goal on. When I get home from shopping, I update the quantities on the spreadsheet. It's really very easy once you get in the habit.

Thursday, January 6, 2011

A Little Levity

At the request of my friend, Modern Day Redneck, I have been working on a serious post about how to calculate quantities in your preps.   I tend to get wrapped up ...and then tangled up ...in details when I try to be serious, so I thought a little levity in the meantime was in order. 

I can't take credit for the following but it sure fits the bill.  I received it from my sister in Colorado and who knows how many hands it passed through before landing in her inbox.   So take it for what it's worth and enjoy a laugh break on me. 

NOT A GOOD IDEA TO ROPE A DEER
(Author unknown, probably for good reason)

I had this idea that I could rope a deer, put it in a stall, feed it up on corn for a couple of weeks, then kill it and eat it.  The first step in this adventure was getting a deer.  I figured that, since they congregate at my cattle feeder and do not seem to have much fear of me when I'm around, it should not be difficult to rope one, get up to it and toss a bag over its head to keep it calm. Then I would hog tie it and transport it home.

I filled the cattle feeder, then hid down at the end of my rope.  The cattle, having seen the roping thing before, stayed well back.  They were not having any of it.  After about 20 minutes, my deer showed up - three of them.  I picked out a likely looking one, stepped out from the end of the feeder, and threw my rope.  The deer just stood there and stared at me.  I wrapped the rope around my waist and twisted the end so I would have a good hold.  

The deer still just stood and stared at me, but you could tell it was mildly concerned about the whole rope situation.  I took a step toward it, it took a step away.  Then I put a little tension on the rope.   Just a little.  That's when my education in deer wrangling began. 

The first thing I learned is that, while a deer may just stand there looking at you funny while you rope it, they are spurred to action when you start pulling on that rope.  That deer EXPLODED!

The second thing I learned is that, pound for pound, a deer is a lot stronger than a cow or a colt.  I could handle a cow or a colt in that weight range on the end of a rope and still retain some dignity.  A deer, however?  No chance!

That thing ran and bucked and twisted and pulled.  There was no controlling it and certainly no getting close to it.  As it jerked me off my feet and started dragging me across the ground, it occurred to me that having a deer on a rope was not nearly as good an idea as I had originally imagined.  The only upside is that they do not seem to have as much stamina as a cow or a colt.  A brief 10 minutes into the struggle, it was tired and not nearly as quick to jerk me off my feet again when I finally managed to stand up.  It took me a few minutes to realize this, since I was mostly blinded by the blood flowing out of the gash in my head.  At this point, I had lost my taste for corn-fed venison.  I just wanted to get that devil creature off the end of my rope!

I figured if I just let it go with the rope hanging around its neck, it would likely go off and die slowly and painfully somewhere.  At the time, there was no love at all between me and that deer.  At the moment, I hated that deer and I would venture to guess the feeling was mutual.  But despite the gash in my head and the several large knots where I had cleverly arrested the deer's momentum by bracing my head against various rocks, I could still think clearly enough to recognize that there was a small chance that I shared some tiny bit of the responsibility for the situation this deer and I were in.  I didn't want the deer to have to suffer a slow death, so I managed to get it lined back up in between my truck and the feeder ...a little trap I had cleverly set beforehand ...kind of like a squeeze chute.  I got it to back in there and I began moving up so I could get my rope back.

Did you know that deer bite?!?  

They do!  I never in a million years would have thought that a deer would bite somebody, so I was very surprised when I reached up there to grab that rope and the little fella grabbed hold of my wrist.  Now, when a deer bites you, it is not like being bit by a horse.  When a horse bites you, they come at you fast, bite and then let go.  When a deer bites you, they bite hard and hang on ...and then they proceed to shake their head like a pit bull.  Trust me, it hurts!  

The proper thing to do when a deer bites you is probably to freeze and draw back slowly.  I tried screaming and shaking instead.  My method was ineffective.  It seemed like the deer had a hold of me, biting down and shaking for several minutes but it was probably only several seconds.  But I, being so much smarter than a deer, tricked it. While I distracted it with letting it try to rip the tendons from my right arm, I reached up with my left hand and pulled the rope loose.  

That is when I got my final lesson in deer behavior for the day.  

Deer will strike at you with their front feet.  They rear right up on their hind legs and strike at you right about head and shoulder level, and their hooves are amazingly sharp.  I learned a long time ago that, when an animal is striking at you and you don't think you can get away easily, the best thing to do is to make a loud noise and make an aggressive move toward the animal.  With cows and horse, this tends to make them back away a little, giving you a chance to escape.  Deer are different.  

In the course of a millisecond, I could tell my plan wasn't working so I devised a different plan.  I screamed like a girl and tried to turn and run.  The reason I had always been told NOT to try to turn and run from a horse that rears up to strike at you is because there is a good chance that it will hit you in the back of the head.  Deer may not be so different from horses in that regard.  Besides being twice as strong and three times as evil as any outlaw bronc, this deer had wicked accurate aim.  The second I turned to run, it hit me square in the back of the head and knocked me down.

Now when a deer knocks you down, it does not leave.  I suspect it does not recognize that you are no longer a threat.  But instead of knocking you down and taking off, they paw at your back and jump up and down on you while you lay there crying like a little girl and trying to shield your head.  

I finally managed to crawl under the truck and the deer went away.  So now I know why when people go deer hunting, they don't bring a rope.  They bring a rifle with a scope to sort of even the odds.  All of these events are true, so help me God.

The letter was signed, simply "An Educated Rancher"

I guess this story was especially humorous to me because I happened to witness a similar incident in our very own driveway involving a rope, Yeoldfurt and a neighbor's stray emu chick. Seriously, I kid you not! No blood was shed, either by Yeoldfurt or the emu ...though the latter did have a few feathers ruffled before it was all over. But that's a story for another day.